AWS Service Catalog provides a powerful framework for organizing, governing, and provisioning cloud resources within an organization. When combined with Terraform, a popular infrastructure as code tool, AWS Service Catalog becomes even more valuable, offering enhanced control, automation, and standardization for resource deployments.
In this example we will prepare our cloud infrastructure, create Catalog and a product using terraform.
Prerequisites:
- Install AWS Sam CLI - here.
- Install Docker (only required if you want to run the Lambda functions in your development environment) - here
- Install AWS CLI - here
- Install Go - here
- Install Python 3.9. Sam will require this exact version even if you have a newer version - here
1. After instalation is done and we have all our requirements ready to use we will clone the project to our directory:
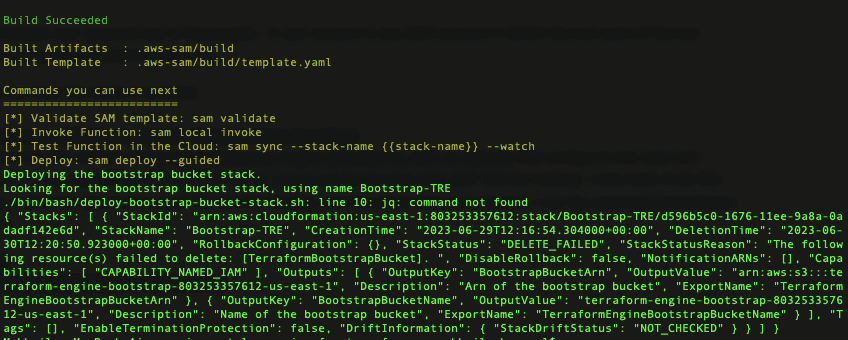
> git clone https://github.com/aws-samples/service-catalog-engine-for-terraform-os.gitFrom your project root folder run following command cp bin/bash/deploy-tre.sh ./ to copy deploy-tre.sh to project root folder.
After that run: ./deploy-tre.sh -r us-east-1
You should see output that build is succesfull:
2. Then we need to setup the following environment variables:
'AWS_ACCOUNT_ID=<YOUR AWS ACCOUNT ID>'
'AWS_REGION=<YOUR REGION OF CHOICE>'
3. Afterwards we will Build the ServiceCatalogTerraformOSParameterParser function:
- From your root project directory run:
cd lambda-functions/terraform_open_source_parameter_parser - Run
go mod init terraform_open_source_parameter_parserto initialize the terraform_open_source_parameter_parser Go module - Run
go env -w GOPROXY=direct - Run
go mod tidyto generate the required go.mod and go.sum files
4. Our next step will be create a python virtual environment:
- From your root project directory run:
cd venv - Create the virtual environment in directory 'venv' by running the command:
python3 -m venv venv - Activate the newly created python virtual environment:
. venv/bin/activate
5. Build the Lambda functions
- Cd to the root directory of the project.
- Run this command to install a local copy of the Python libraries required for the lambdas:
pip3 install -r lambda-functions/state_machine_lambdas/requirements.txt -t lambda-functions/state_machine_lambdas --upgrade
- Run:
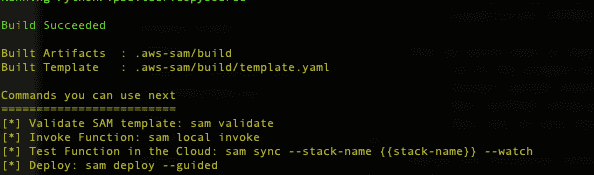
GOOS=linux GOARCH=amd64 CGO_ENABLED=0 sam build
This is going to take a while at the end if everything is correct you will receive this output:
6. Our next step is to deploy it to an AWS Account:
- Run:
aws cloudformation create-stack --stack-name Bootstrap-TRE --template-body file://cfn-templates/Bootstrap.yaml --capabilities CAPABILITY_NAMED_IAM
7. Then we would need to Deploy the Terraform CLI wrapper scripts:
- cd to the wrapper-scripts directory:
cd wrapper-scripts - Install python wheel package:
pip install wheel - Run:
python3 setup.py bdist_wheel - Run:
aws s3 sync dist s3://terraform-engine-bootstrap-$AWS_ACCOUNT_ID-$AWS_REGION/dist
8. Deploy the Terraform reference engine:
- cd to the root directory of the project.
- Run
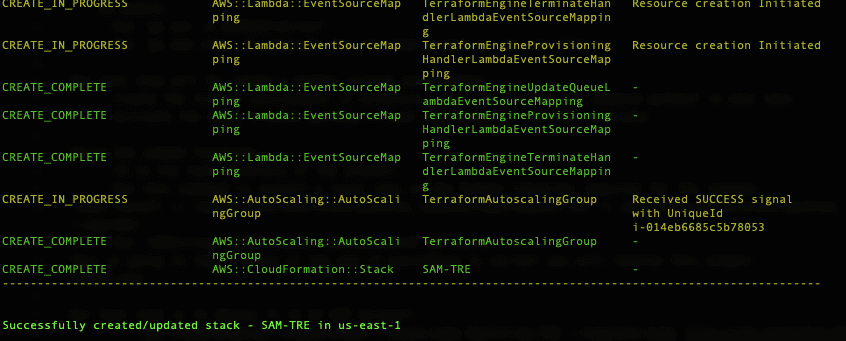
sam deploy --s3-bucket terraform-engine-bootstrap-$AWS_ACCOUNT_ID-$AWS_REGION --stack-name SAM-TRE --capabilities CAPABILITY_NAMED_IAM
- The default settings can be overridden by passing the parameters in the template.yaml. - Example command for updating the default VPC setting - --parameter-overrides VpcCidr="<Your_VpcCidr>" PublicSubnet1CIDR="<Your_PublicSubnet1CIDR>" PrivateSubnet1CIDR="<Your_PrivateSubnet1CIDR>" - Example command for updating the default EC2 instance type setting - --parameter-overrides EC2InstanceType="<Your_EC2InstanceType>"
After all this steps are done we can move to our AWS Console to AWS Service Catalog Page
9. First of all we start with Product Creation:
- Go to Product list page in Administration section
- Click 'Create Product'
- Here we need to check box next to "Terraform Open Source"
- Fill in Product name and description so it will be easy to understand what it is.
- For example purpose i will do simple terraform code
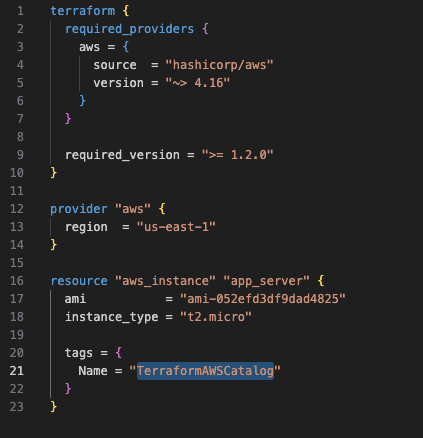
- In order to upload our template file we will need to archivate our terraform code. I will use following command:
tar -czvf main.tar.gz main.tf - Then upload this file to our product, and fill in all the rest information
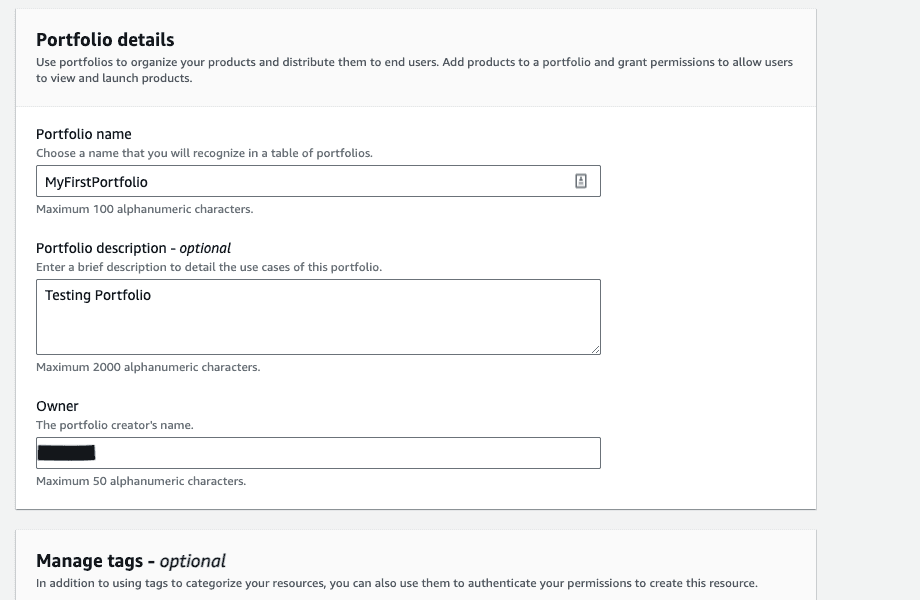
10. Now we can create a Portfolio
- Go to Portfolio page in Administration section
- Click "Create Portfolio'
- Fill in all the info:
10. Also we would need to create role which would create resources on your behalh.
In our example we will create role ServiceCatalog with Administrator permisions.
- Go to IAM Console to the Role tab
- Click on create Role
- In trusted entity field find "Service Catalog", we will change the policy later
- In Permitions we will add Administrator permitions, you can create your owners
- In Name, review, and create tab fill in the info, and click "Create role"
- Click on newly created role and go to "Trust relations tab"
- Now we would need to change our policy for the following:
{
    "Version": "2012-10-17",
    "Statement": [
        {
            "Sid": "GivePermissionsToServiceCatalog",
            "Effect": "Allow",
            "Principal": {
                "Service": "servicecatalog.amazonaws.com"
            },
            "Action": "sts:AssumeRole"
        },
        {
            "Effect": "Allow",
            "Principal": {
                "AWS": "arn:aws:iam::account_id:root"
            },
            "Action": "sts:AssumeRole",
            "Condition": {
                "StringLike": {
                    "aws:PrincipalArn": [
                        "arn:aws:iam::account_id:role/TerraformEngine/TerraformExecutionRole*",
                        "arn:aws:iam::account_id:role/TerraformEngine/ServiceCatalogTerraformOSParameterParserRole*"
                    ]
                }
            }
        }
    ]
}
Please note we would need to change the field account_id to our actual account id. This will be lines 15, 21, 22.
- Click on 'Update Policy'
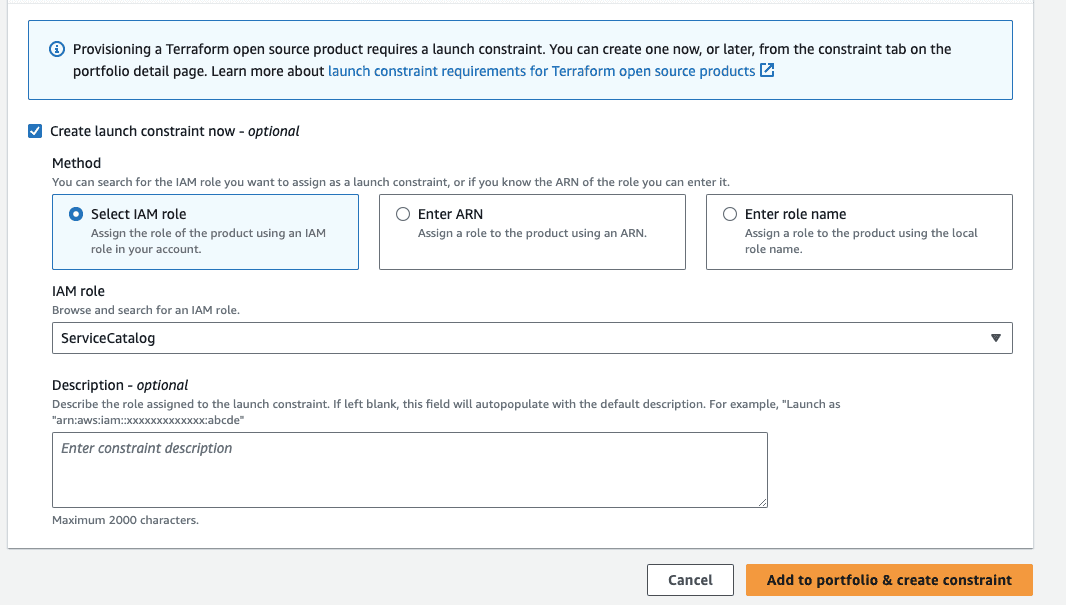
11. After our product is ready and we have our role created and ready we can add product to Portfolio:
- Go to Service Catalog page
- Click on a Portfolio in Administration section
- Click on 'Add Product'
- Choose the product you want to add
- At the botom of the screen you will see Launch constraint section. Here you need to choose a role which we created in step 10
- After you applied the role you can click on "Add to portfolio & Create constraint"
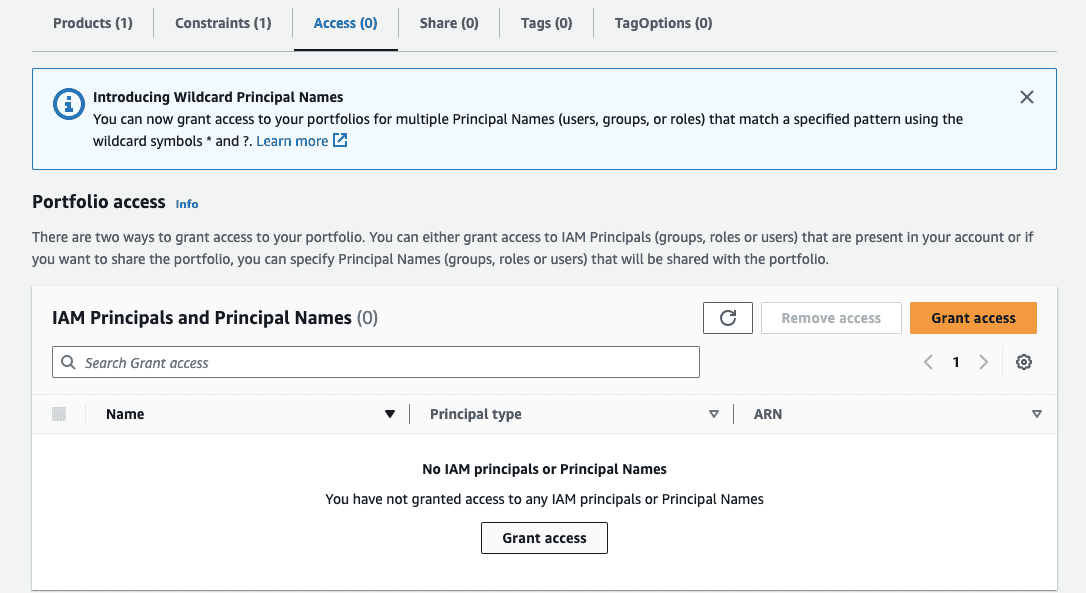
- Last but not least - we need to share this portfolio with other users. In order to do it click on Portfolio you creater, and find Access Page. Here you can grant access to a group, user or even role.
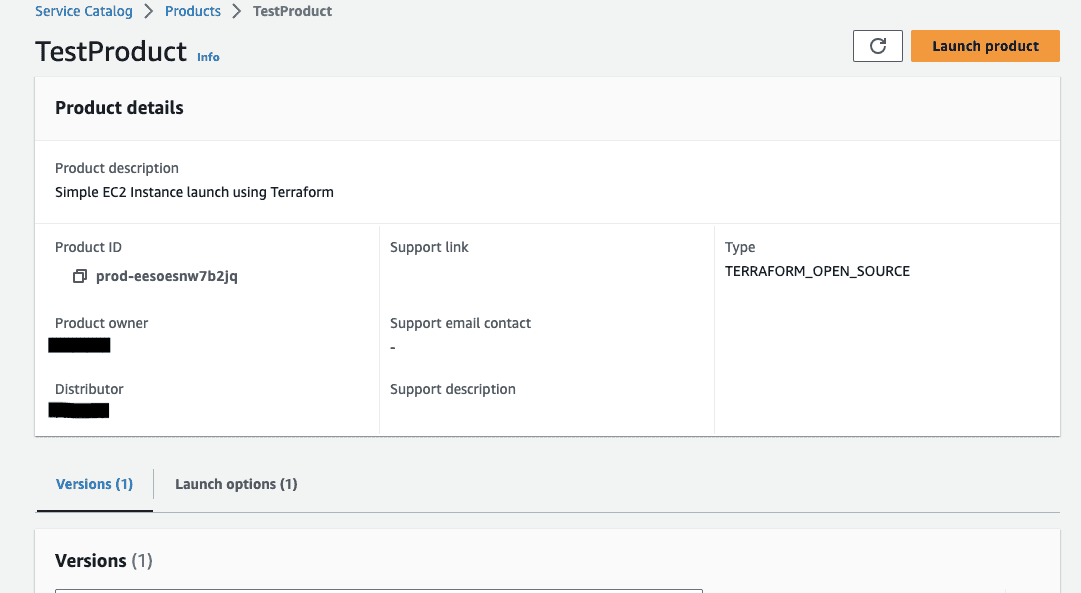
12. Now lets launch our created product:
- In order to launch the product we added you can login with a user who was granted access to it
- Go to the AWS Service Catalog Page.
- Open Products in Provisoning section.
- Your product should be listed there, click on it
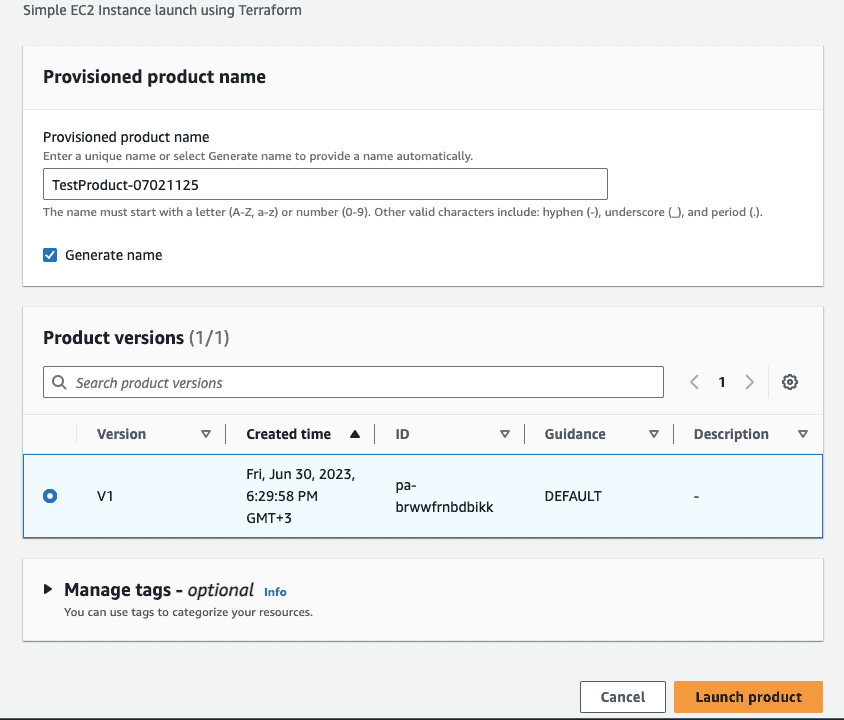
- Then Click on Launch Product, choose a name for it or check the box to autogenerate it
- We will see that instance started launching
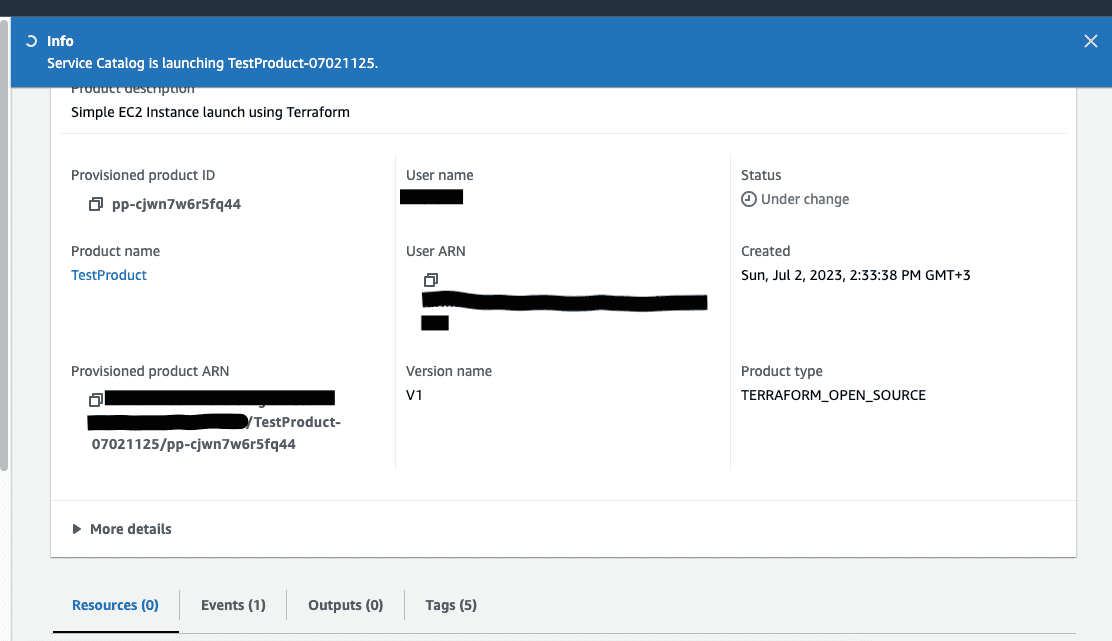
- Now we can go to our EC2 Instances we will see our new instance is initializing
