In the ever-evolving landscape of cloud computing, security remains a paramount concern for organizations worldwide. As data breaches and cyber threats continue to make headlines, safeguarding digital assets and sensitive information has become a top priority. Embracing a proactive approach to security is crucial, ensuring potential vulnerabilities are identified and mitigated before they can be exploited.
Enter Amazon Inspector, vulnerability management service that continually scans your Amazon EC2 instances, Amazon ECR container images, and AWS Lambda functions for software vulnerabilities and unintended network exposure
In this article, we will dive into the world of Amazon Inspector, exploring its core functionalities and understanding how it contributes to securing your AWS environment.
Features of Amazon Inspector to consider:
Automated Security Assessments:
After Amazon Inspector is activated, it automatically discovers and begins scanning all eligible resources
Flexibility:
You can activate scanning for EC2, ECR, and AWS Lambda functions. You can manage the scanning types from the account management page in the Amazon Inspector console or using Amazon Inspector APIs.
Actionable Insights and Reporting:
Inspector generates comprehensive reports detailing security findings, risk levels, and suggested remediation actions.
Cost-Effectiveness:
With its pay-as-you-go pricing model, Amazon Inspector provides a cost-effective solution for conducting security assessments. Users are charged only for the assessments they run, making it an economical choice for organizations of all sizes.
Setting up Amazon Inspector
- Login to your AWS Account and search for Amazon Inspector page
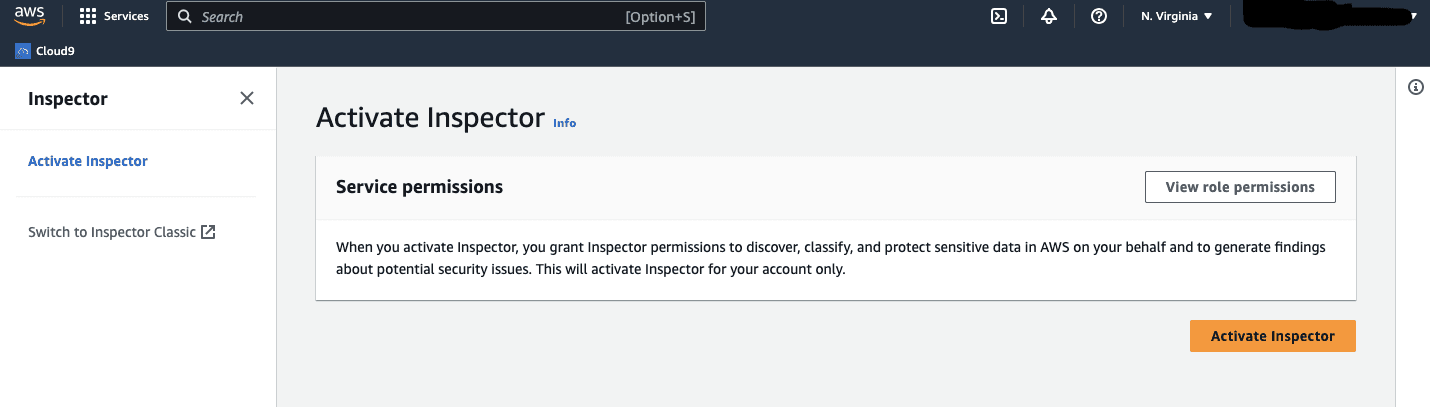
- Click on
Activate Inspectorbutton
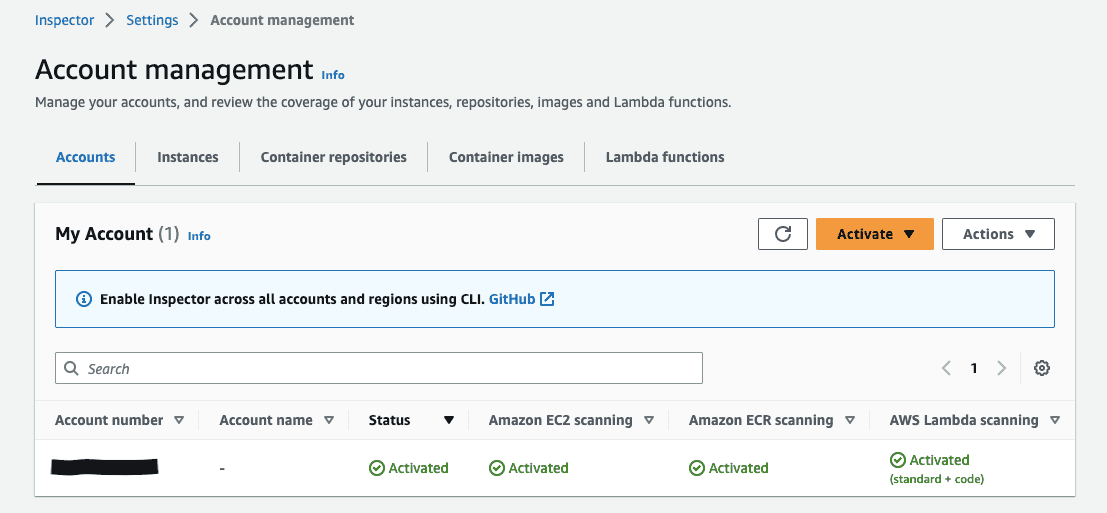
- Click on
Account Management. Here you can set wich resources you want Inspector to check, also which accounts (if you have a corporate one). Let's check Activate button here you can set which resources you want to scan
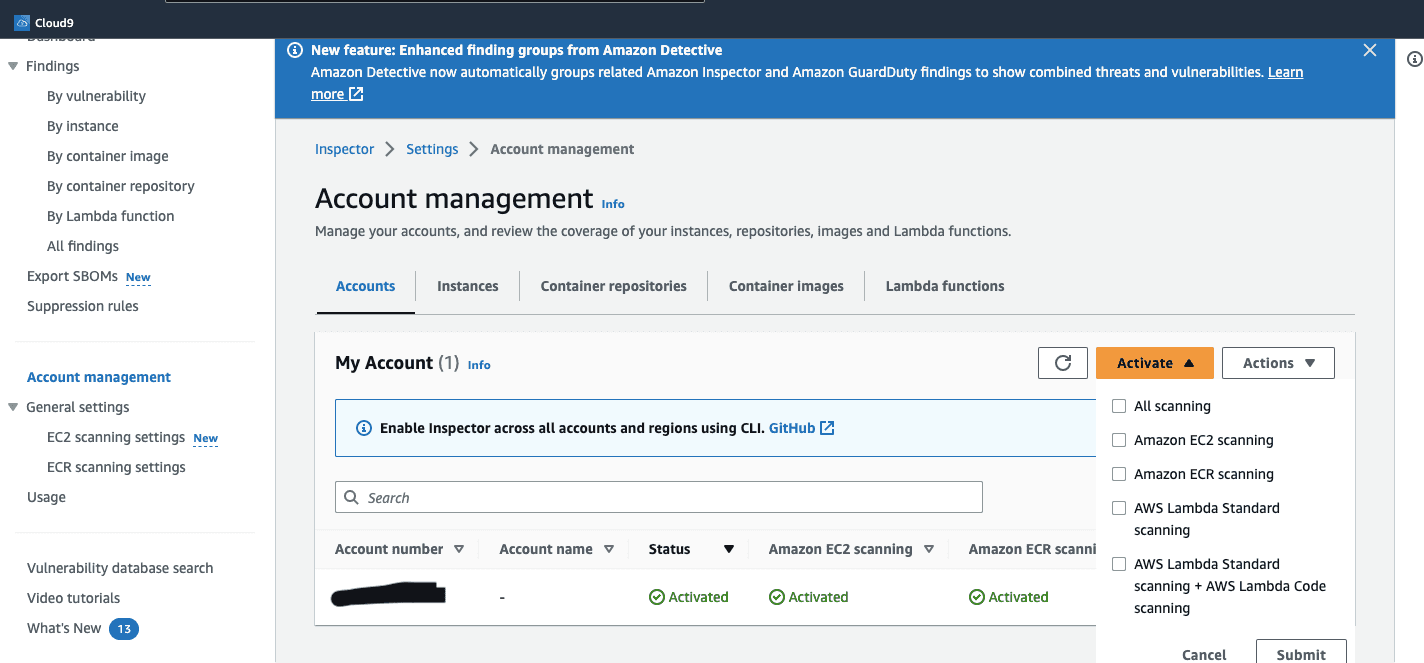
- Let's check out last box
AWS Lambda Standard scanning + AWS Lambda Code scanningin order to let Inspector to scan our Lambda functions code as per default it is not activated
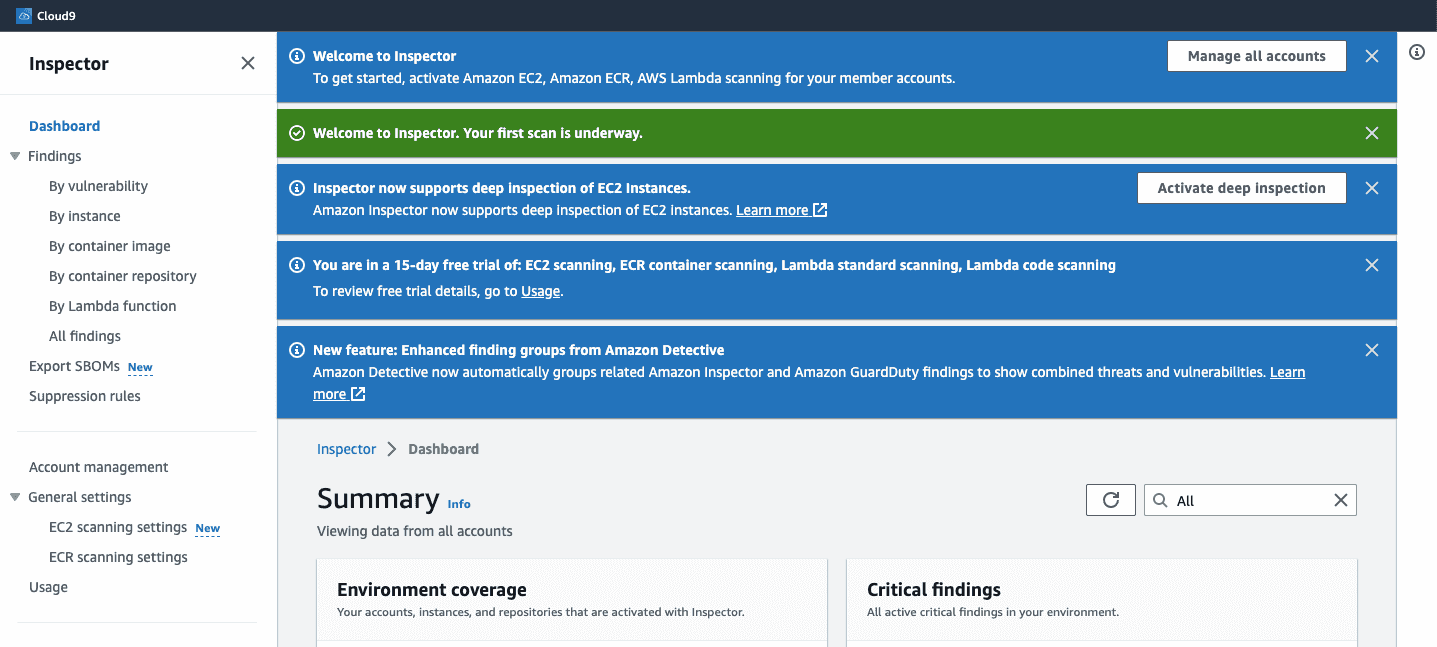
Now let's check key points in Inspector's interface
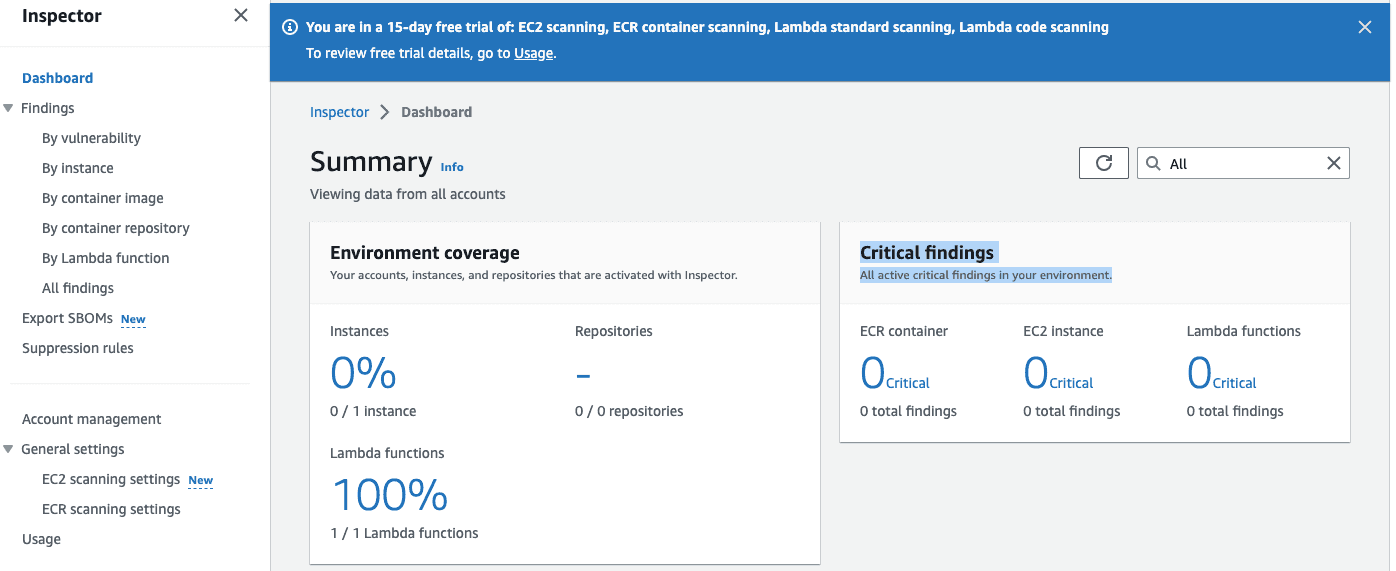
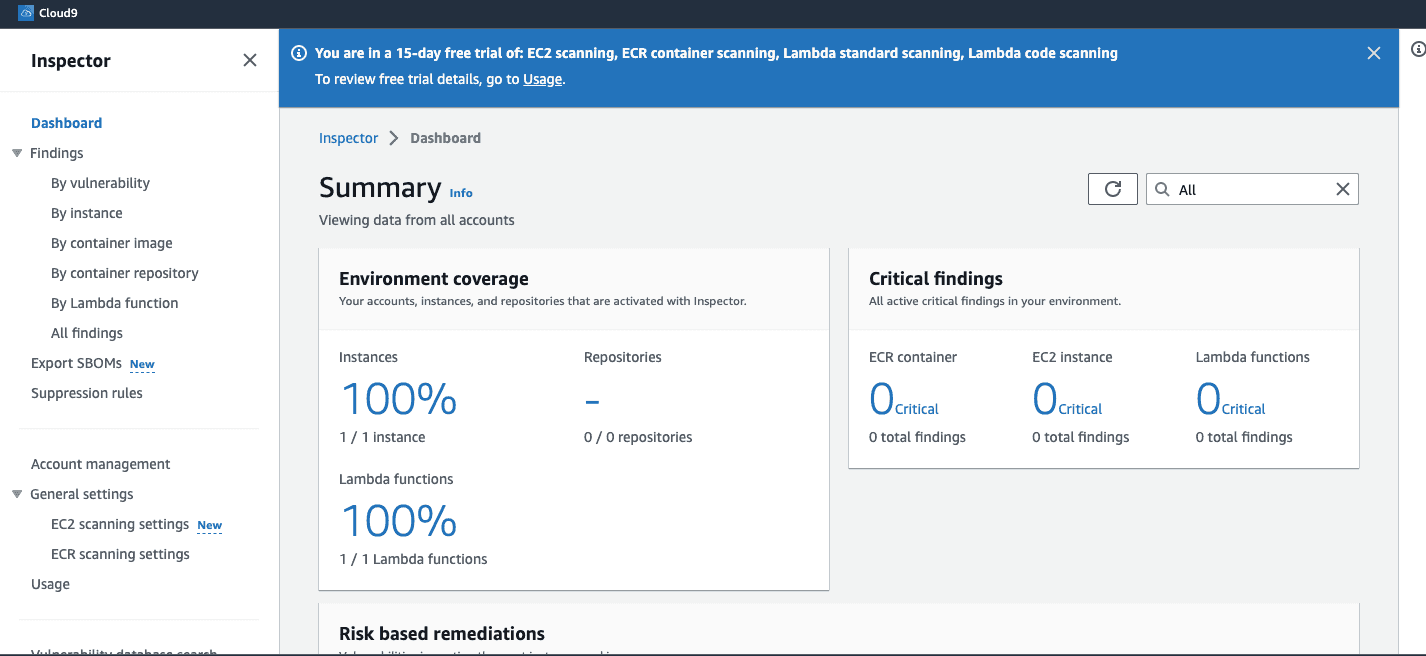
- Dashboard shows you a brief summary such as how many resources it is scanning divided by sections such as Ec2, Lambda function or ECR Repositories as well as findings on each section
- Findings section let's you sort issues in a way you want - by vulnerability, by instance etc.
- Export SBOMs section let's you Software Bill Of Materials to a dedicated S3 bucket. You can check our previous article regarding SBOMs to understand what is it
- Suppression rule section let's you exclude Amazon Inspector findings that match your criteria. You can find how to create suppression rule here
- Account management section shows you which AWS accounts are scaned and and which resources
- In General Settings section you can adjust Amazon Inspectors permisions as well as deactivate it
- Usage section will show you Total Monthly Projected Cost
Amazon Inspector EC2 scanning
You might noticed that i have 1 Lambda function on the account which is actively scanned but Ec2 instance on my account is not scanned yet
This is because in order for Amazon Inspector to detect software vulnerabilities for an Amazon EC2 instance, the instance must be a managed instance in Amazon EC2 Systems Manager (SSM). You can read more info regarding this here
Let's now enable scanning for this instance
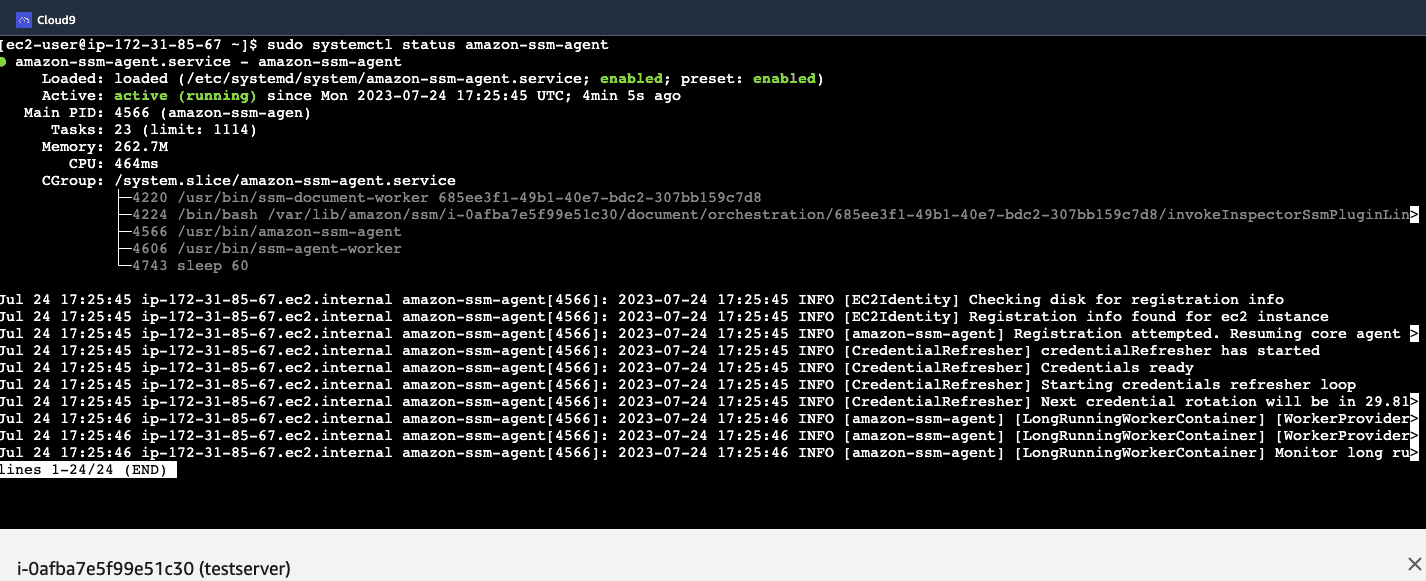
- SSM is activated for most instances by default - let's check status of it in our instance by running:
sudo systemctl status amazon-ssm-agentIf not please visit this page
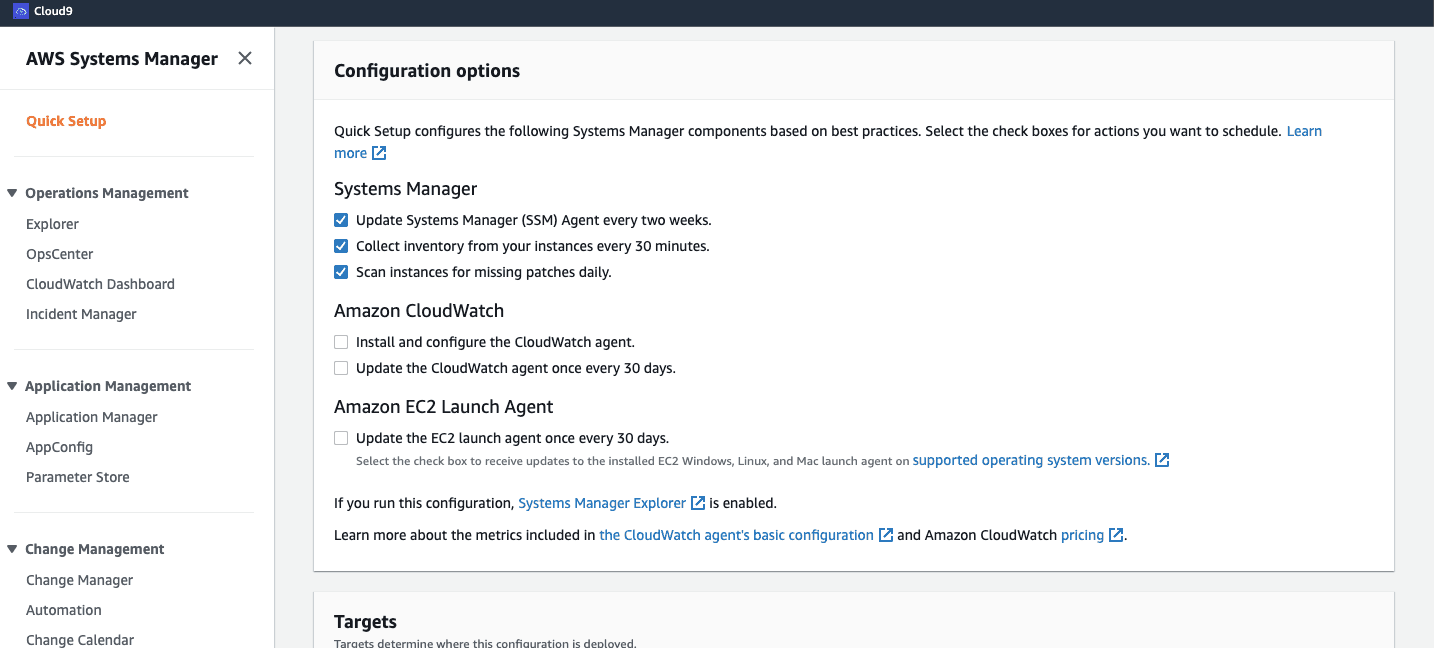
- When it's activated we can navigate to AWS Systems Manager page in AWS Console. Click on
Quick Setup, then click on Create underHost Managementoption. You can find more info regarding how to configure instance permissions for Systems Manager here
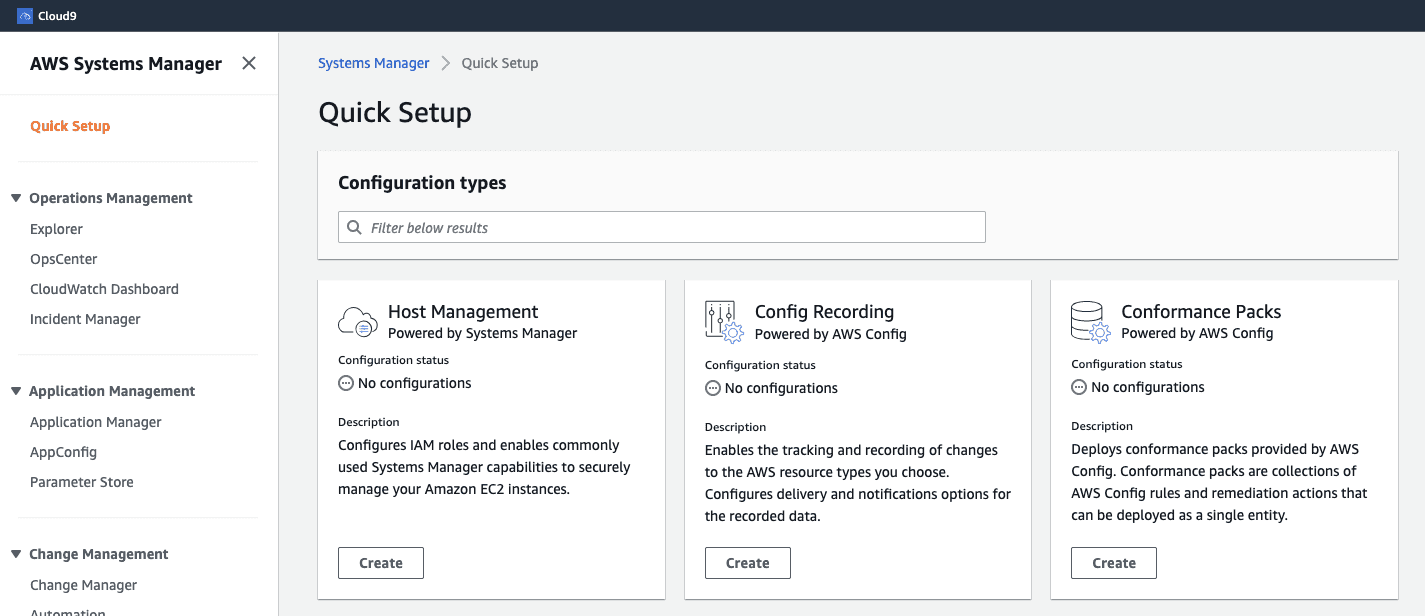
- Check boxes needed as in screenshot and click on Create. Wait until configuration deployed
- After a while you can see in Amazon inspector dashboard that your EC2 instance is monitored
Exporting SBOM to S3 using Aws cli
In order to export SBOM to S3 bucket we would need:
- Supported resources that are being actively monitored by Amazon Inspector
- An Amazon S3 bucket configured with a policy that allows Amazon Inspector to add object to
While creating a bucket we would need to add following Policy:
{
	"Version": "2012-10-17",
	"Statement": [
		{
			"Sid": "allow-inspector",
			"Effect": "Allow",
			"Principal": {
				"Service": "inspector2.amazonaws.com"
			},
			"Action": [
				"s3:PutObject",
				"s3:PutObjectAcl",
				"s3:AbortMultipartUpload"
			],
			"Resource": "<YOUR_S3_ARN>/*",
			"Condition": {
				"StringEquals": {
					"aws:SourceAccount": "<YOUR_ACCOUNT_ID>"
				},
				"ArnLike": {
					"aws:SourceArn": "arn:aws:inspector2:<YOUR_REGOIN>:<YOUR_ACCOUNT_ID>:report/*"
				}
			}
		}
	]
}- A AWS KMS key configured with a policy that allows Amazon Inspector to use to encrypt your reports. Let's create a new AWS KMS key for our needs
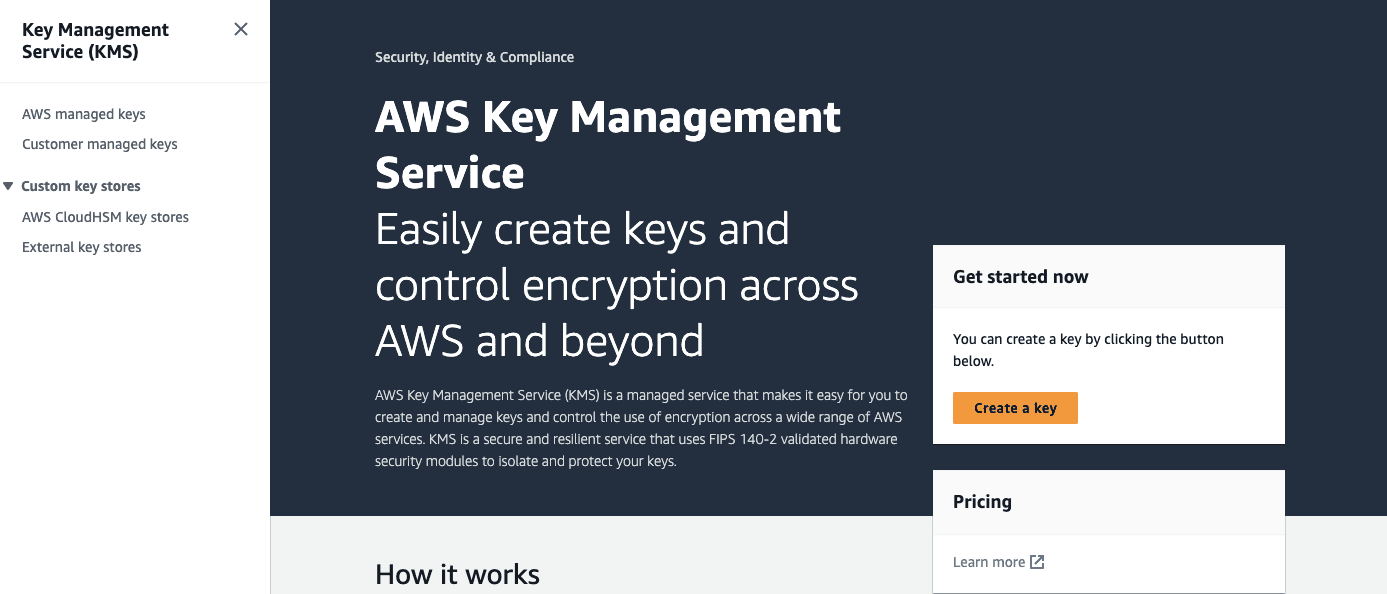
- In your AWS Console navigate to Key Management Service and click on
Create a Key
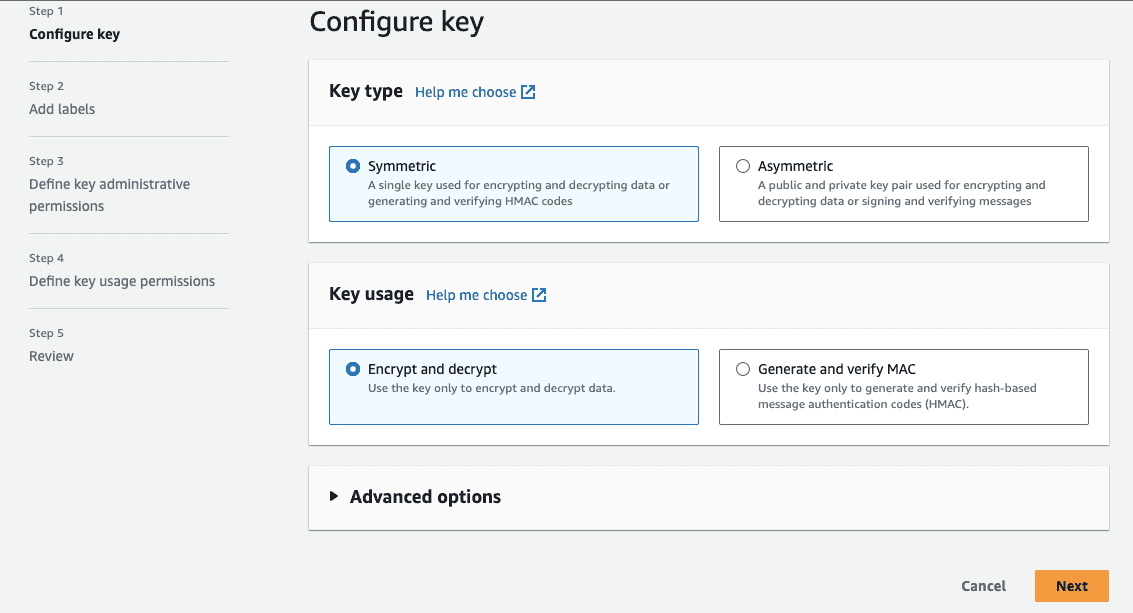
- Key should be customer managed and symmetric encryption so leave it as default. Please note, the key must be in the same AWS Region as the S3 bucket that you configured to store the report.
- Here you need feel fields so it would be easier for you to understand what it is used for after creation
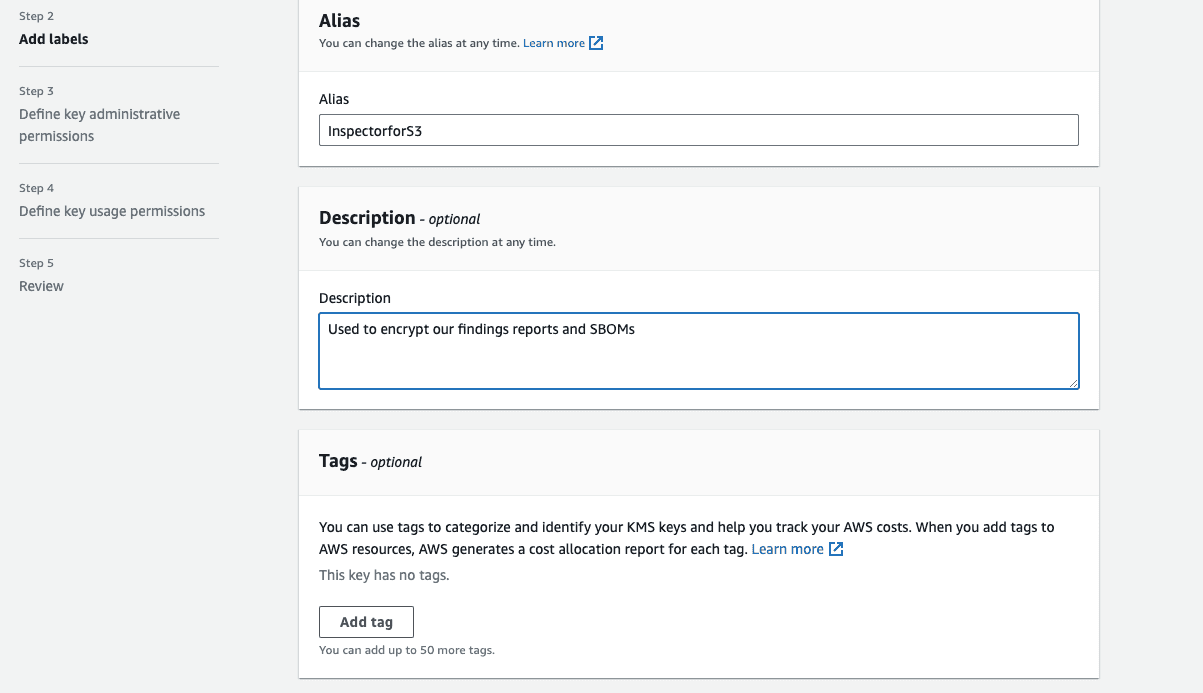
- You would need to define your key Administrator in Step 3. I would recommend to choose your current IAM User
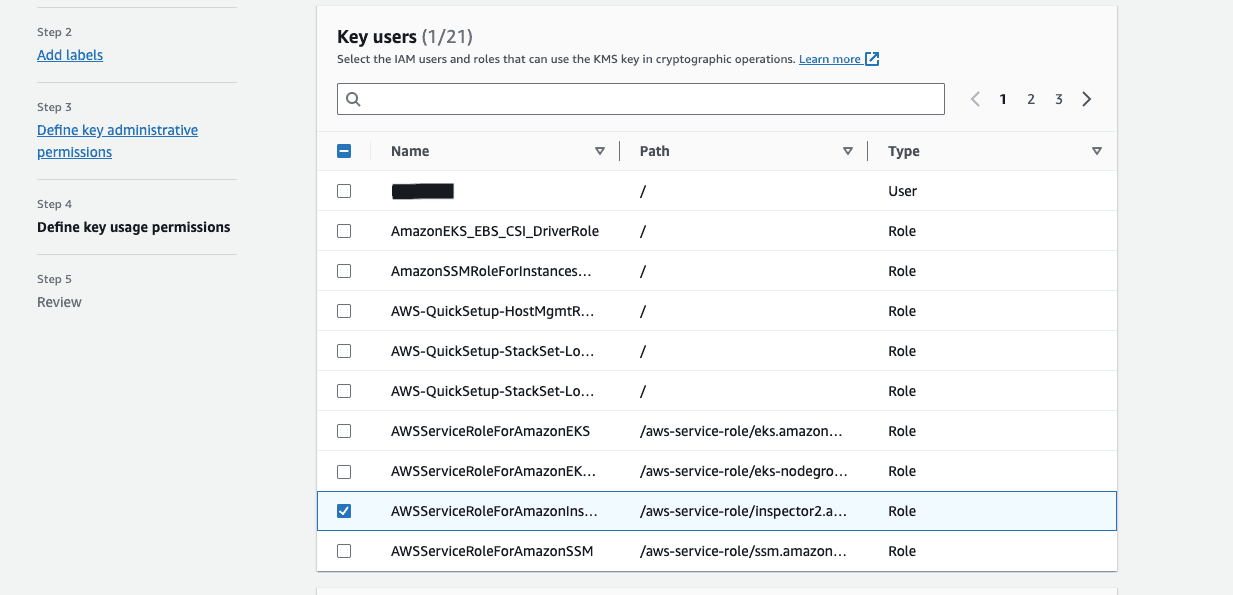
- In Step 4 you need to specify a role which is going to use that key in my case it is
AWSServiceRoleForAmazonInspector2
- Check if everything is correct and click on
Finish - Now we need to update our policy. Open your newly created key. If you do not see a key policy with an Edit button, you must first select
Switch to policy view. You would need to add this policy inside the one you already have
        {
            "Sid": "Allow Amazon Inspector to use the key",
            "Effect": "Allow",
            "Principal": {
                "Service": "inspector2.amazonaws.com"
            },
            "Action": [
                "kms:Decrypt",
                "kms:GenerateDataKey*"
            ],
            "Resource": "*",
            "Condition": {
                "StringEquals": {
                    "aws:SourceAccount": "<YOUR_ACCOUNT_ID"
                },
                "ArnLike": {
                    "aws:SourceArn": "arn:aws:inspector2:<YOUR_REGION>:<YOUR_ACCOUNT_ID:report/*"
                }
            }
        },
Please make sure you have latest AWS CLI version as per now (aws-cli/2.13.22 or more) as our next command will not be available. You can download it here
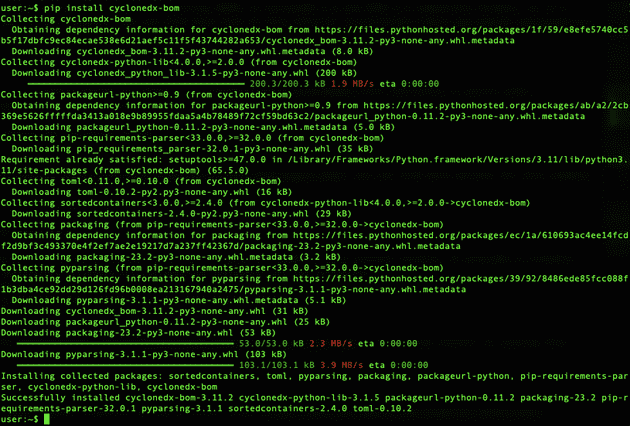
When everything is ready we can use AWS Cli to upload SBOM to S3 bucket:
First you need to know is that Amazon Inspector supports exporting SBOMs in CycloneDX 1.4 and SPDX 2.3 compatible formats, so it's very important to specify format in your command. You can find more info on this official page
Run the following command
aws inspector2 create-sbom-export --report-format CYCLONEDX_1_4 --s3-destination bucketName=<YOUR_CONFIGURED_S3_BUCKET_NAME>,keyPrefix=inspectorSBOM,kmsKeyArn=<YOUR_KMS_KEY_ARN>If everything is correct you should see following output:

Here you can find more options for this command
Let's discuss some more tools working with SBOMs
CycloneDX Python SBOM Generation Tool
If you are working with Python this is going to be must have tool to generate SBOMs of your project locally. It provides a runnable Python-based application for generating CycloneDX bill-of-material documents for the following:
- Your current Python Environment
- Your project's manifest (e.g. Pipfile.lock, poetry.lock or requirements.txt)
- Conda as a Package Manager
Please check following page for installation - here. Or you can install it running this command - pip install cyclonedx-bom
When tool is installed you can generate SBOM using following command:
cyclonedx-py -pip -i <PATH_TO_YOUR_PIPFILE.LOCK> --format xml -o <PATH_TO_YOUR_OUTPUT_FILE>
 After running this command you should get a file in xml format. If you would like to change it to
 json simply change format tag value in the command
You can find more information about CycloneDX Python SBOM Generation Tool on their GitHub page